Homelab - Bastion Teleport & Reverse Proxy
Why Teleport?
Teleport offers several advantages that make it an excellent choice for a “gateway” to your HomeLab:
- Strong authentication with MFA and WebAuthn
- Unified access to different resources (SSH, Web Applications, Kubernetes, Databases…)
- Centralized access and authorization management with RBAC
- Modern and intuitive web interface
- Complete audit of all sessions and actions
- Native Zero Trust solution
Unlike a classic VPN solution, which can often be blocked in many locations, Teleport allows access through HTTPS-encapsulated flows (and therefore rarely blocked in general) to all your resources, while greatly simplifying certificate and authorization management.
Moreover, where a VPN gives you access to the entire network (which can be a security risk), Teleport allows you to define precisely who can access what, when and how.
Main Components
Teleport consists of several services that can be installed together or separately according to your needs:
- Auth Service: The heart of Teleport that manages authentication and authorization. It maintains the user database, issues temporary certificates and enforces access policies.
- Proxy Service: The public entry point that routes connections to internal resources. It exposes the web interface and manages secure tunneling.
- SSH Service: For SSH access to servers with session recording and replacement of traditional SSH keys with certificates.
- Application Service: For access to internal web applications without modifying those applications.
- Database Service: For secure database access with identity management.
These components can be installed on a single machine for a simple installation (perfect for a HomeLab), or distributed across multiple servers for greater scalability.
The Bastion Principle
For those unfamiliar with Teleport and the bastion principle: a bastion is a server that will be exposed (not necessarily on the internet), and on which we will have rigorous authentication.
A bastion is also and above all a controlled means of access to your resources! Think of it as a reverse proxy with security.
graph TD
    B{Bastion Teleport} <--> Internet
    Server_1 <--> B
    Server_2 <--> B
    Server_3 <--> B
    Web_Apps <--> B
    Databases <--> B
Why Teleport & Why a Bastion?
There are many solutions that allow access to your HomeLab from the outside, both open source (Guacamole, Apache Guacamole…) and closed source (Wallix, CyberArk…).
But none in my opinion is as well made and easy to use as Teleport for several reasons:
- The solution is modern and very well documented with an active community
- Free Community version for individuals and small teams
- Native Zero Trust approach that makes no compromises on security
- Native integration with modern tools (Kubernetes, cloud providers, etc.)
- Audit and compliance built in from the start
Regarding the Bastion, I have often been faced with an inability to use a VPN, whatever the reason: flow blocked by a corporate firewall, no local administrator rights on the workstation, not your personal machine, network restrictions…
Using a Bastion allows you to access your resources with just a web browser, which works everywhere.
The Setup
Let’s move on to the implementation.
The setup we want is what we would like to have in the context of a secure and professional Homelab.
You can of course adapt it to your specific needs.
In the end we will have:
- A main Teleport server: which will allow us to access our other resources securely
- A Nginx server: which will serve as our reverse proxy and SSL termination
- Private client servers accessible via our bastion
- Public servers, available on the internet
Target architecture:
graph TD
    Internet[🌐 Internet] --> ReverseProxy[🔄 Nginx<br/>Reverse Proxy]
    ReverseProxy --> TeleportProxy[🛡️ Teleport Proxy<br/>*.domain.test]
    TeleportProxy --> SSHTargets[💻 SSH Servers]
    TeleportProxy --> WebApps[🌐 Web Applications<br/>pfSense, NAS, etc.]

    subgraph "DMZ Zone"
        ReverseProxy
        TeleportProxy
    end

    subgraph "Private Zone"
        SSHTargets
        WebApps
    end

    subgraph "Public Zone"
	    ReverseProxy --> Blog[📝 Public Blog<br/>blog.domain.test]
    end
With a setup like this you will be able to properly expose your elements! Public for those that can be (website, blog, public services…) or private for those that have no reason to be exposed but for which you (or another authorized user) need to be able to take control remotely, from the internet and without VPN.
Configuration
Important note: The reverse proxy and bastion can be on the same machine for simplicity, but separating the machines is recommended for production.
Reverse proxy
For our demo we will assume that we want to expose a bastion and associated hosts as well as a public blog that will not be behind the bastion. If you want to expose more elements, simply repeat the operations by updating the configurations.
Prerequisites
Required infrastructure:
- A public IP (you can request a Full Stack IPv4 from your ISP in the case of a HomeLab, for most this service is free, you can also use a VPS)
- A domain name with full DNS control (Available from OVH, Cloudflare…)
- Machines (you can use a hypervisor like Proxmox, VMware, etc.)
The steps
Important: For our example here the domain used will be domain.test, but you will need to adapt it to your domain.
1 - Server preparation
Create a machine (or use the Teleport one) and install the necessary components:
# System update
sudo apt update && sudo apt upgrade -y

# Installing Nginx
sudo apt install nginx -y

# Installing Certbot for Let's Encrypt
sudo apt install curl certbot python3-certbot-nginx python3-certbot-dns-cloudflare -y

# Installing Teleport (latest stable version)
TELEPORT_EDITION="oss"
TELEPORT_VERSION="17.6.0"
curl [https://cdn.teleport.dev/install.sh](https://cdn.teleport.dev/install.sh) | bash -s ${TELEPORT_VERSION?} ${TELEPORT_EDITION?}
2 - DNS Configuration
You will need to create public DNS records with your DNS provider.
Records to create:
*.domain.test→ Your public IP (wildcard for Teleport)domain.test→ Your public IP (main domain)blog.domain.test→ Your public IP (example of public service)
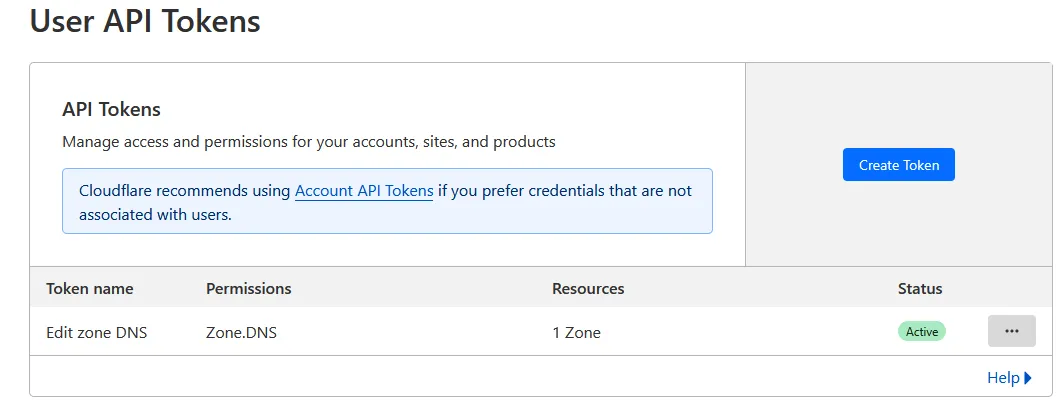
Example on Cloudflare:

3 - SSL Certificate Management
Configuration for Cloudflare DNS challenge (recommended for wildcards):
# Create the Cloudflare credentials file
sudo mkdir -p /root/.secrets
sudo nano /root/.secrets/cloudflare.ini
File content:
Simply create an API key on your Cloudflare portal like this:
Then simply store the generated key in a file on the server in question.
#/root/.secrets/cloudflare.ini

# Cloudflare API credentials
dns_cloudflare_api_key = your_global_api_key
# Secure the file
sudo chmod 600 /root/.secrets/cloudflare.ini
# Generate the wildcard certificate for Teleport
sudo certbot certonly \
--dns-cloudflare \
--dns-cloudflare-credentials /root/.secrets/cloudflare.ini \
--dns-cloudflare-propagation-seconds 30 \
-d '*.domain.test' \
-d domain.test
# Generate the certificate for the blog
sudo certbot certonly \
--dns-cloudflare \
--dns-cloudflare-credentials /root/.secrets/cloudflare.ini \
--dns-cloudflare-propagation-seconds 30 \
-d blog.domain.test4 - Nginx Configuration
Configuration for the blog (public service):
# /etc/nginx/conf.d/blog.conf

# WebSocket handling
map $http_upgrade $connection_upgrade {
    default upgrade;
    ''      close;
}

# Backend for the blog
upstream blog_backend {
    server 192.168.1.4:80; # Private IP of your blog server
    keepalive 32;
}

server {
    listen 443 ssl http2;
    server_name blog.domain.test;

    # SSL Configuration
    ssl_certificate     /etc/letsencrypt/live/blog.domain.test/fullchain.pem;
    ssl_certificate_key /etc/letsencrypt/live/blog.domain.test/privkey.pem;
    ssl_protocols       TLSv1.2 TLSv1.3;
    ssl_prefer_server_ciphers off;

    # Security headers
    add_header Strict-Transport-Security "max-age=31536000; includeSubDomains" always;
    add_header X-Frame-Options DENY always;
    add_header X-Content-Type-Options nosniff always;

    # Proxy configuration
    client_max_body_size 100M;
    proxy_read_timeout   600s;

    location / {
        proxy_pass [http://blog_backend](http://blog_backend);
        proxy_http_version 1.1;

        proxy_set_header Host              $host;
        proxy_set_header X-Real-IP         $remote_addr;
        proxy_set_header X-Forwarded-For   $proxy_add_x_forwarded_for;
        proxy_set_header X-Forwarded-Proto $scheme;
        proxy_set_header Upgrade           $http_upgrade;
        proxy_set_header Connection        $connection_upgrade;
    }
}

# HTTP to HTTPS redirect
server {
    listen 80;
    listen [::]:80;
    server_name blog.domain.test;
    return 301 [https://$host$request_uri](https://$host$request_uri);
}
Configuration for Teleport:
# /etc/nginx/conf.d/teleport.conf

map $http_upgrade $connection_upgrade {
    default upgrade;
    '' close;
}

# Teleport Backend
upstream teleport_backend {
    server 192.168.1.2:443; # IP of your Teleport server
    keepalive 32;
}

server {
    listen 443 ssl http2;
    server_name *.domain.test domain.test;

    # SSL Configuration
    ssl_certificate     /etc/letsencrypt/live/domain.test/fullchain.pem;
    ssl_certificate_key /etc/letsencrypt/live/domain.test/privkey.pem;
    ssl_protocols TLSv1.2 TLSv1.3;
    add_header Strict-Transport-Security "max-age=31536000; includeSubDomains" always;

    # Configuration for SSL proxy to Teleport
    proxy_ssl_server_name on;
    proxy_ssl_name        $host;

    location / {
        proxy_pass [https://teleport_backend](https://teleport_backend);
        proxy_http_version 1.1;

        # Headers required for Teleport
        proxy_set_header Host              $host;
        proxy_set_header X-Real-IP         $remote_addr;
        proxy_set_header X-Forwarded-For   $remote_addr;
        proxy_set_header X-Forwarded-Proto $scheme;
        proxy_set_header Upgrade           $http_upgrade;
        proxy_set_header Connection        $connection_upgrade;

        # Timeouts for long sessions
        proxy_read_timeout 600s;
        proxy_buffering    off;
    }
}

# HTTP to HTTPS redirect
server {
    listen 80;
    listen [::]:80;
    server_name *.domain.test domain.test;
    return 301 [https://$host$request_uri](https://$host$request_uri);
}
Test and reload configuration:
# Test Nginx configuration
sudo nginx -t

# If OK, reload
sudo systemctl reload nginx

# Check status
sudo systemctl status nginx
Teleport
Now let’s move on to the main Teleport server.
Once Teleport is installed, you just need to configure a single main file to get started.
Basic Configuration
# Main configuration file
sudo nano /etc/teleport.yaml
Main server configuration:
# /etc/teleport.yaml
version: v3
teleport:
  nodename: bastion-teleport
  data_dir: /var/lib/teleport
  log:
    output: stderr
    severity: INFO
    format:
      output: text
  ca_pin: ""
  diag_addr: "127.0.0.1:3000"  # Internal diagnostic interface

# Authentication service
auth_service:
  enabled: true
  cluster_name: "domain.test"
  listen_addr: 0.0.0.0:3025
  proxy_listener_mode: multiplex

  # Authentication configuration
  authentication:
    type: local
    second_factor: webauthn  # Security key support (YubiKey, etc.)
    webauthn:
      rp_id: domain.test

  # Session policy
  session_recording: node-sync

  # Connection token configuration
  tokens:
    - "proxy,node:your-secret-token-here"

# SSH Service
ssh_service:
  enabled: true
  listen_addr: 0.0.0.0:3022

  # X11 forwarding support
  x11:
    enabled: true

# Proxy Service (web entry point)
proxy_service:
  enabled: true
  web_listen_addr: 0.0.0.0:443
  tunnel_listen_addr: 0.0.0.0:3024
  public_addr: domain.test:443

  # HTTPS Configuration
  https_keypairs: []
  https_keypairs_reload_interval: 0s
  acme:
    enabled: false  # Disabled because we use Let's Encrypt with Nginx

  # Trust X-Forwarded-* headers from reverse proxy
  trust_x_forwarded_for: true

# Application Service (for web apps) To be preferred for specific machines
app_service:
  enabled: true
  debug_app: false

  apps:
  # pfSense interface
  - name: pfsense
    uri: [https://192.168.1.1](https://192.168.1.1)
    public_addr: "pfsense.domain.test"
    insecure_skip_verify: true
    labels:
      env: "production"
      team: "infrastructure"

  # Synology NAS
  - name: nas
    uri: [http://192.168.1.10:5000](http://192.168.1.10:5000)
    public_addr: "nas.domain.test"
    insecure_skip_verify: true
    labels:
      env: "production"
      team: "storage"
Startup and Initial Configuration
# Test configuration
sudo teleport configure --test

# Enable and start service
sudo systemctl enable teleport
sudo systemctl start teleport

# Check status
sudo systemctl status teleport

# View logs
sudo journalctl -u teleport -f
Creating the First Administrator User
# Create a local user with all privileges
sudo tctl users add admin --roles=editor,access --logins=root,admin,john
Functionality Test
Once configured, you should be able to:
- Access the web interface:
https://domain.test - See your configured applications in the Applications tab
- Connect via SSH to added servers
- Access web applications via configured subdomains
Conclusion
Your Homelab infrastructure is now operational.
Of course there is still much room for improvement, but this configuration provides a good architecture for hosting your services.